On this page
- 01Why passes are different
- 02Acclimatisation: earn the height before pass day
- 03Timing the crossing
- 04On foot: crossing a high pass as a trekker
- 05By vehicle or motorbike: crossing high road passes
- 06Permits and access: check the current rules
- 07Do's and don'ts for crossing Himalayan passes
- 08Example crossings of Himalayan mountain passes
- 09How TrailX helps you plan a pass
- 10The pass is only halfway
- 11Where to next?
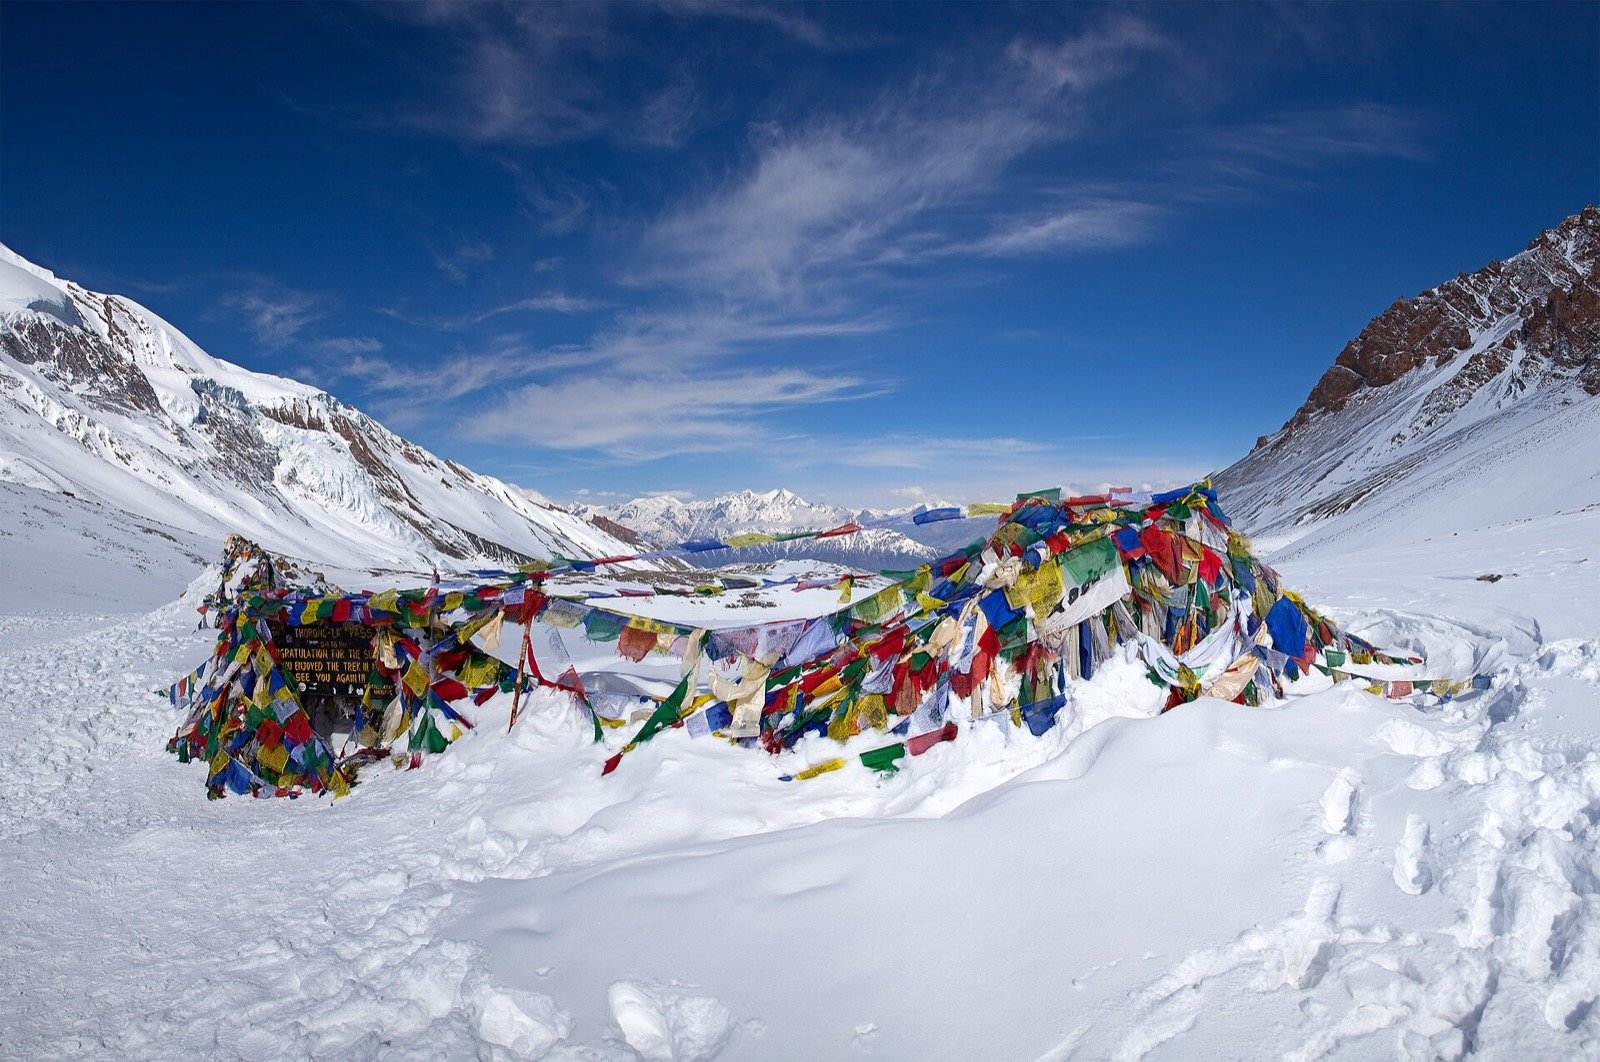
A pass is the moment a Himalayan journey turns into a story. You climb for hours, or days, towards a notch in the skyline, and then suddenly there are prayer flags, a cairn, and a whole new valley falling away on the other side. Himalayan mountain passes are also where most of the real risk of a trip sits: thin air, fast-changing weather and a long way down in either direction.
This guide is for trekkers crossing passes on foot in Nepal and the Indian Himalaya, and for drivers and riders on the high road passes of Ladakh, Spiti, Lahaul and Sikkim. Much of the advice overlaps; where it doesn't, we've split it into sections.
Why passes are different
A pass day stacks several problems on top of each other.
- Altitude. Many trekking and road passes sit between 4,000 and 5,500 metres. Thorong La is about 5,416 m, Larke La on the Manaslu Circuit about 5,100 m, Baralacha La on the Manali–Leh road roughly 4,890 m. Your body works noticeably harder up there, and so does your engine.
- Short weather windows. Mornings are often clear and calm. By early afternoon, cloud builds, wind picks up and snow can arrive even in the main seasons.
- Exposure at the top. Passes are, by definition, the low point of a ridge, which makes them natural wind funnels. There's rarely shelter at the crest.
- Snow and ice. Old snow and frozen meltwater linger on the shady side long after the sunny side is dry.
- Streams that rise. Glacier-fed streams are lowest in the cold early morning and swell through the day as the sun melts snow higher up.
- Long descents. The far side of a big pass can mean 1,500 m or more of downhill, on tired legs, sometimes in fading light.
None of this is a reason to stay home. It's a reason to plan a high altitude pass crossing differently from any other day.
Acclimatisation: earn the height before pass day
The commonly accepted guidance is simple, and it works for walkers and drivers alike. Above roughly 3,000 m, increase your sleeping altitude gradually, building in a rest day every few days. Climb high during the day and come back down to sleep lower where you can. Drink regularly, eat even when you're not hungry, and go easy on alcohol.
Learn the warning signs in plain words:
- AMS (acute mountain sickness): headache, nausea, loss of appetite, poor sleep, unusual tiredness or dizziness. It feels like a bad hangover.
- HAPE (fluid on the lungs): breathlessness even at rest, a persistent cough, sometimes frothy or pink sputum, tightness in the chest, being far slower than everyone else.
- HACE (swelling of the brain): confusion, clumsiness, stumbling as if drunk, unusual behaviour, extreme drowsiness.
The rule that matters most: if symptoms worsen, go down. Mild AMS can settle with rest at the same altitude, but it should never be pushed over a pass. HAPE and HACE are emergencies, and descent is the treatment. Go down with someone, even at night.
Some travellers use medication such as acetazolamide to help with acclimatisation. That's a conversation to have with a doctor before you travel, not something to improvise on the trail. The NHS page on altitude sickness is a clear, reliable primer, and our own safety guidelines cover the wider picture of travelling in remote terrain.
The pass will still be there tomorrow. A rest day costs you a day; pushing on with a pounding headache can cost you the whole trip.
Timing the crossing
Start early. For the big trekking passes, an alpine start is normal. On Thorong La, most people leave the high camp well before dawn so they can be over the top by mid-morning. On road passes, an early start means firmer gravel, lower water crossings and less traffic on narrow sections.
Set a turnaround time. Decide the evening before when you'll turn back if you're not at the top, and stick to it. That decision is much harder to make well at 5,000 m with a headache.
Respect the afternoon. Wind, cloud and snow tend to build after midday. Getting over the top in the morning gives you the descent in decent light and weather.
Know the season in general terms. Nepal's main trekking seasons are spring and autumn; monsoon brings cloud, leeches and landslides to lower trails, and winter can shut high passes with snow. Many Ladakh and Lahaul road passes are usually open from roughly late spring to autumn and close with snow, and opening dates vary a lot from year to year. Always check current road and trail status locally before committing. Our guide to your first trek in Nepal goes deeper on seasons by region.
On foot: crossing a high pass as a trekker
Pace yourself. Walk at a pace where you can still talk in short sentences, with small steps and short regular stops. On a big pass the climb from high camp can take many hours, so pace is everything.
Use the high camp. The night at high camp is usually short and cold, and many people sleep badly. That's normal. What isn't normal is a worsening headache or breathlessness at rest; those are reasons to go down, not up.
Carry the right things on pass day:
- Warm layers, including insulation, a windproof shell, hat, gloves and a spare pair
- Sunglasses with real UV protection and sunscreen (snow glare is brutal)
- At least a litre or two of water, in an insulated bottle or kept inside your jacket so it doesn't freeze
- Snacks you'll actually eat when nauseous: sweets, biscuits, dried fruit
- Headtorch with fresh batteries, a small first-aid kit and blister care
- Microspikes if there's any chance of ice
Our gear checklist is a good base to build from.
Crossing snow. Follow the established track and step into existing footprints. Early morning snow is firm; by afternoon it turns soft and slippery. On icy sections, short steps and microspikes beat speed every time. If a slope looks like it could slide, don't be the first to test it.
River crossings below passes. Cross early in the day when water is lowest. Scout for a wide, shallow section rather than the narrowest point. Unclip your hip belt and chest strap so you can shed the pack if you fall, face upstream, use poles for three points of contact, and never cross alone. If it looks too strong, wait for the morning.
Descending on tired knees. The descent is where most slips happen. Shorten your stride, lengthen your poles, and stop to eat before the steep part, not after.
By vehicle or motorbike: crossing high road passes
Driving over a 5,000 m pass is a very different day from walking one, but the mountain is the same. Our first overlanding trip guide and the off-road tips cover the basics; here's what matters most on high passes. If you've driven the Alps, our alpine pass road trips guide is a gentler warm-up, but the Himalaya adds altitude, distance and far fewer services.
Engine and passengers at altitude. Non-turbo engines lose noticeable power in thin air, so expect more gear changes and slower climbs. Passengers can get altitude sickness from a fast drive up just as walkers can, often faster because the car does the work. Build the same acclimatisation stops into your road plan.
Plan fuel carefully. In Ladakh and Spiti, the gaps between fuel pumps can be very long, and climbing at altitude burns more than you'd think. Fill up whenever you can and carry a reserve where it's safe and legal to do so.
Water crossings (nallahs). Snowmelt streams across the road are usually lower early in the day. Walk a crossing before you drive it if you can't see the bottom, keep a steady, slow pace, and don't stop midstream.
Hairpins and gravel. Use low gears on descents instead of riding the brakes. Keep well away from the drop-off edge on loose gravel, and take hairpins wide and slow. On a motorbike, look through the turn, not at the edge.
Give way sensibly. Uphill traffic generally has priority, but in practice give way to trucks, convoys and whoever has the easier place to stop. Sound your horn on blind bends.
Don't stop in the wrong place. Never park on a narrow ledge, below a loose rock face or in a marked avalanche or landslide zone. Find a wide, stable pull-out for photos.
Altitude affects drivers too. A headache, slow reactions and poor judgement are dangerous behind the wheel. Share driving if you can, and don't push long days at high altitude.
Carry spares. At minimum: a good spare tyre, puncture kit, tow strap, basic tools, fuses, and engine oil. Riders should add spare cables, tubes and a pump. Help can be hours away.
For understanding gradients and surfaces before you go, our off-road terrain analysis post explains how we read a route.
Permits and access: check the current rules
Permit rules in the Himalaya change often, so treat this as orientation, not a rulebook. Always check current rules with official sources or a reputable local operator before you travel.
- India. Some areas of Ladakh, Sikkim and Arunachal Pradesh need Inner Line Permits (for Indian citizens) or Protected Area Permits (for foreign nationals). Some places are open to Indian citizens but not to foreigners.
- Nepal. Restricted areas such as Manaslu, Upper Mustang and Humla/Limi need special permits and a licensed guide, often with a minimum group size. Nepal also announced in 2023 that foreign trekkers in national parks and conservation areas must hire a licensed guide, though enforcement has varied by region. The Nepal Tourism Board is the place to start.
- Border areas. Some passes near international borders are restricted to civilians or to foreigners, or are closed entirely. A route existing on a map does not mean you're allowed to travel it. Don't attempt to enter restricted zones; it's illegal and can be genuinely dangerous.
On TrailX, many trail pages carry a permits section, but always confirm it against the current official rules.
Do's and don'ts for crossing Himalayan passes
Do
- Do acclimatise properly. Raise sleeping altitude gradually and take rest days.
- Do start early. Aim to be over the top by late morning.
- Do set a turnaround time. Decide it the night before and keep it.
- Do check the weather. Look at the forecast the evening before and again in the morning.
- Do carry warm layers. Even on a sunny day, the crest can be freezing.
- Do cross rivers early. Morning water is lowest; never cross alone.
- Do plan fuel and spares. Fill up at every chance on long road sections.
- Do download maps offline. Signal disappears long before the pass.
- Do check permits and road status. Every season, every time.
- Do look after each other. Keep the group together and watch for symptoms in others.
Don't
- Don't ignore symptoms. A worsening headache means stop or go down.
- Don't go up when sick. Never cross a pass with AMS getting worse.
- Don't linger at the top. Take your photos, then start descending.
- Don't race the descent. Most slips happen on the way down.
- Don't drive tired at altitude. Share the wheel and keep days shorter.
- Don't stop in danger zones. Avoid narrow ledges and avalanche or landslide areas.
- Don't trust roadside height boards blindly. In Ladakh they often overstate altitudes.
- Don't enter restricted areas. If permits aren't available to you, the answer is no.
- Don't rely on one phone. Carry a power bank and a backup.
Example crossings of Himalayan mountain passes
Here's a mix of trekking and driving routes from TrailX. Numbers come straight from each trail page; difficulty is the TrailX score, which weighs distance, climb, gradient, altitude and terrain differently for hiking and off-road.
| Trail | Country / region | Type | km | Climb (m) | TrailX difficulty |
|---|---|---|---|---|---|
| Thorong La Pass Crossing | Nepal, Manang | Hiking | 65.7 | 3,014 | Extreme |
| Manaslu Circuit Trek | Nepal, Gorkha | Hiking | 199.0 | 8,836 | Extreme |
| Lauribina Pass Trek | Nepal, Rasuwa | Hiking | 15.4 | 699 | Hard |
| Kinja Lamjura Pass Trek | Nepal, Koshi Province | Hiking | 19.3 | 2,045 | Hard |
| Hampta Pass Hiking trail | India, Himachal Pradesh | Hiking | 35.1 | 2,304 | Extreme |
| Pin Bhaba pass trek | India, Himachal Pradesh | Hiking | 98.6 | 4,264 | Extreme |
| Kuari pass trail | India, Uttarakhand | Hiking | 18.3 | 1,938 | Hard |
| Umasi La Pass Crossing | India, Zanskar to Paddar | Hiking | 9.6 | 734 | Hard |
| Manali to Leh - Zanskar Route | India, Himachal Pradesh / Ladakh | On-Road | 422.4 | 7,296 | Hard |
| Leh to Leh - Nubra Circuit | India, Ladakh | On-Road | 534.3 | 6,736 | Moderate |
| North Sikkim Loop (Dongkya la trail) | India, North Sikkim | Off-Road | 160 | 2,994 | Hard |
| Chamba to Killar - Saach Pass | India, Himachal Pradesh | Off-Road | 173.1 | 9,661 | Hard |
A few notes on reading the table. Thorong La is the classic, and TrailX also has longer versions such as Manang to Thorong La (84.5 km, 4,718 m of climbing). Hampta Pass (about 4,270 m) is a popular first high pass in Himachal, while Umasi La is short at 9.6 km but rated Hard. For a bigger trekking crossing, the Parang La trail runs 94.8 km from Khiber to Tso Moriri, and the Rupin Pass Trail covers 76.6 km from Sangla to Sankri.
On the road side, the Manali–Leh corridor is where many people first meet passes like Rohtang (around 3,980 m) and Baralacha La. In Ladakh, the Diskit to Saser La Expedition (117.1 km, Hard) and Chushul to Mahe - Kaksang La (76.1 km, Moderate) head into sensitive areas where access rules apply, while The Umba La expedition (259.1 km) and the Padri Pass Trail (342.1 km) are long, committing off-road days. Notice how Saach Pass climbs more than most treks in the table: total ascent on a road route adds up quickly over hairpins.
Browse more in Ladakh off-road, Himachal Pradesh hiking, Uttarakhand hiking and Nepal hiking.
How TrailX helps you plan a pass
- Elevation profile and max height. Every trail page shows the full profile, so you can see exactly where the big climb sits and how long the descent is. If you're new to reading them, start with how to read an elevation profile.
- 3D terrain and topo maps. Toggle 3D terrain or the Outdoors topographic map with contour lines to see the shape of the valley and the pass. Our guide to topographic map route planning shows how.
- Weather forecast. Each trail page includes a forecast, handy the evening before a crossing.
- Water crossings and surface breakdown. See how many water crossings a route has and how much is tarmac versus gravel, dirt or rock.
- Permit info. Many trail pages include a permits section to point you in the right direction.
- Offline maps and navigation. In the TrailX app, download regional maps and individual trails, then follow turn-by-turn voice navigation with off-route alerts when there's no signal.
- Condition warnings. The app flags snow and cold, landslide risk on steep ground in heavy rain, and extreme weather.
- GPX export. Take a route to your GPS device or another app. Here's how to download GPX files.
Planning your own route between passes? The Route Composer lets you sketch a multi-stop plan with an elevation profile and weather along the way.
The pass is only halfway
The best pass crossings feel almost uneventful: an early start, a steady climb, a few minutes at the flags, and a careful descent. That calm comes from everything you did beforehand, from the rest days to the fuel stop to the early alarm.
Take the altitude seriously, respect the afternoon, check the rules, and turn around without regret when the mountain says not today. The valley on the other side will wait for you.
Where to next?

Written by
TrailX
Hikers, riders and drivers mapping the world's trails, and sharing what we learn along the way.
Responses