How to Analyze Terrain Before an Off-Road Adventure
Use an off road route planner to read surface, gradient, water crossings, altitude and remoteness before you drive, and learn what a map can't tell you.
On this page
- 01Start with two numbers, then look past them
- 02How TrailX rates off-road difficulty
- 03Surface: how much is actually unpaved?
- 04Steep sections and maximum gradient
- 05Water crossings and seasonal river levels
- 06Altitude
- 07Remoteness: fuel, signal, mechanics and medical help
- 08Satellite imagery, 3D terrain and street-level views
- 09Weather and condition warnings
- 10Legal access and permits
- 11Using an off road route planner for 4x4 routes
- 12A quick terrain checklist
- 13The point of all this research
- 14Where to next?
Most of what goes wrong on an off-road trip could have been spotted from the sofa. A climb steeper than the brochure suggested, a river that is ankle-deep in October and impassable in March, a 200 km stretch with no fuel. A good off road route planner won't drive the track for you, but it can tell you a surprising amount about it before you leave home, if you know where to look.
This is how we do our desk research before a 4x4 or overland route, and where each piece of the puzzle shows up on a TrailX trail page.
Start with two numbers, then look past them
Distance and total ascent are the first things everyone reads, and they are a good start. They are also easy to misjudge on their own.
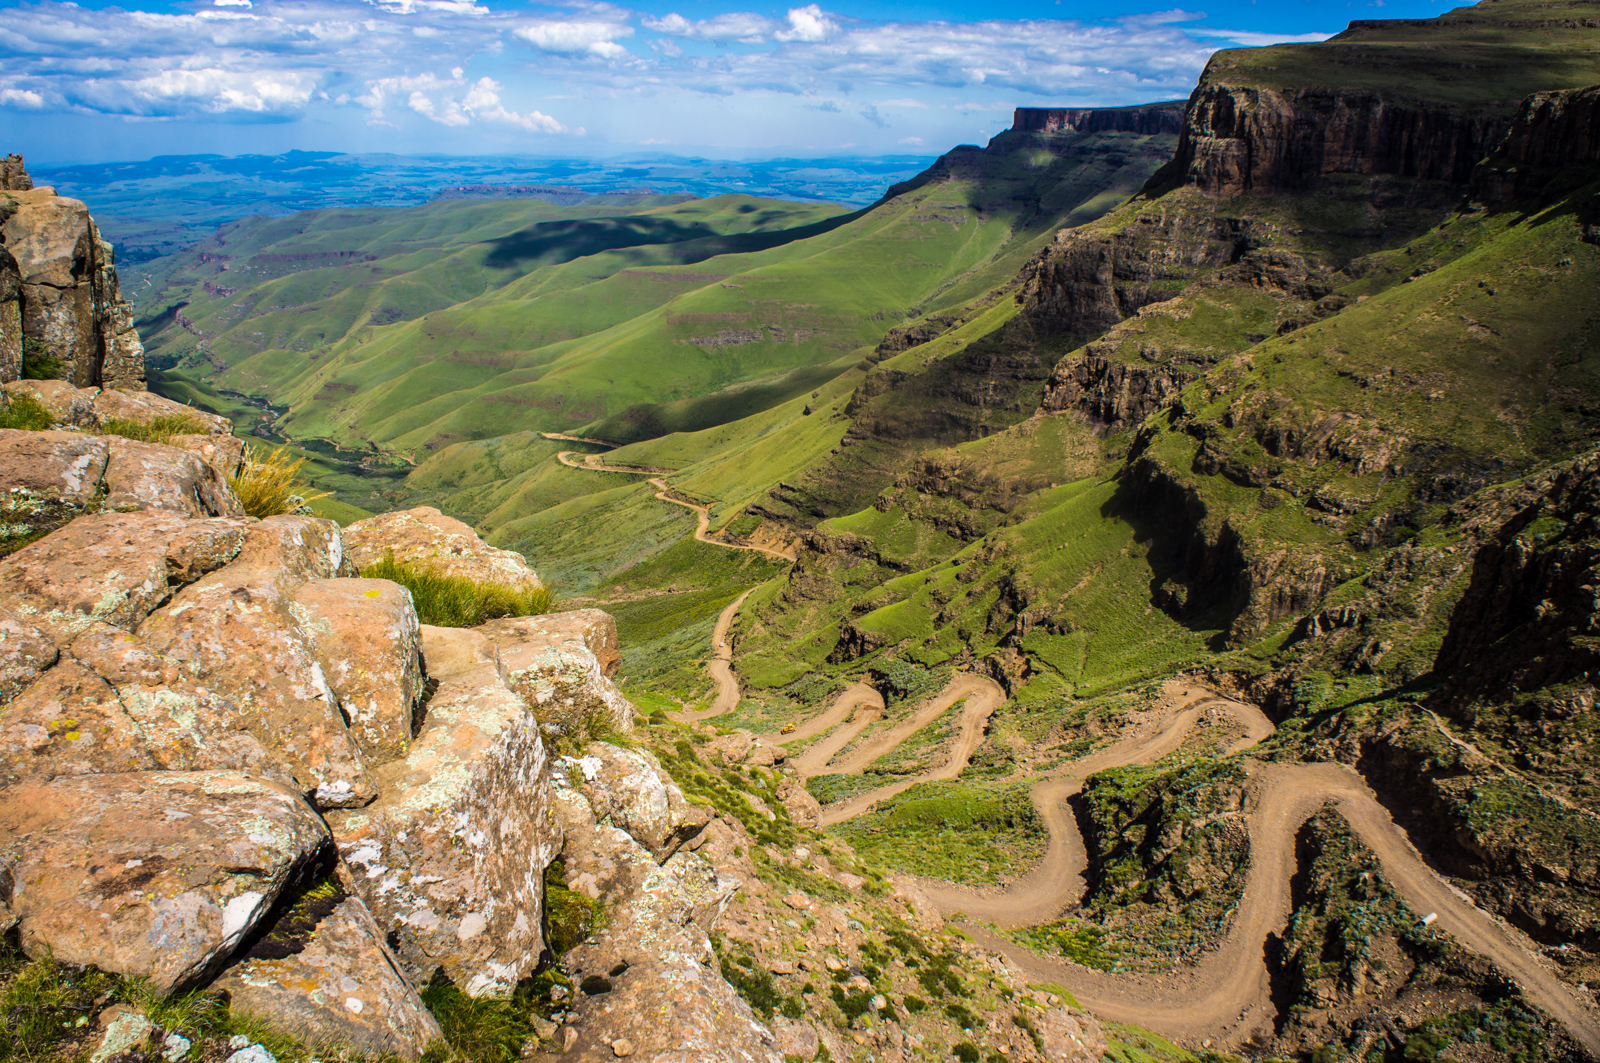
Take two routes with exactly the same length. Rodds Bay to Agnes Water 4WD in Queensland is 76.6 km with 156 m of climbing and rated Easy. Sani Pass to Lesotho Highlands Loop in KwaZulu-Natal is also 76.6 km, but with 1,768 m of ascent, and it is rated Hard. Same odometer reading, completely different day.
Ascent tells you how much climbing there is in total, not how it is packaged. 500 m spread over a long valley drive is gentle. 500 m packed into two kilometres of switchbacks is the kind of section where people stall on loose rock. That's why the elevation profile matters more than the headline figure. If you want a refresher on reading one, our post on how to read an elevation profile walks through it.
How TrailX rates off-road difficulty
Every trail gets a score from 0 to 100, which maps to Easy (0–24), Moderate (25–49), Hard (50–74) or Extreme (75–100). The weighting depends on the activity. For off-road routes it leans on ruggedness, elevation gain, gradient and terrain, rather than distance, which is why a short route can still come out Hard.
The Koranna Getaway 4x4 Trail in the Free State is a good example: 45.1 km and 576 m of ascent, and rated Hard. Meanwhile the Zagora to Tazarine Desert Route in Morocco covers 228.6 km with 528 m of climbing and sits at Moderate. Kilometres alone don't make a route difficult in a 4x4. The ground does.
Treat the rating as a starting point. It can't know your vehicle, your tyres or how much rain fell last week. Our 4x4 tutorial covers how to match a route to your rig and your experience.
Surface: how much is actually unpaved?
Every trail page has a surface breakdown. It splits the route into tarmac and unpaved, then breaks the unpaved part down into gravel, dirt and rock where the data allows.
This tells you a lot about pace and tyre pressures. Gravel is usually fast but loose on corners. Dirt can be easy when dry and turn to grease after rain. Rock means low range, slow lines and careful tyre placement. If the rocky share sits on the steepest part of the profile, that's the section to study hardest.
Our off-road tips cover driving technique on each of these surfaces, and when to air down.
Steep sections and maximum gradient
Hover over the elevation profile on a trail page and the map follows along, so you can see exactly where each climb sits. Look for short, sharp spikes rather than long ramps. Those spikes are where the maximum gradient lives, and maximum gradient is one of the inputs to the off-road difficulty score.
For a closer look, download the track and drop it into Upload & analyse. You don't need an account to view the analysis. It shows the gradient distribution split into flat (0–3 %), moderate (3–8 %) and steep (over 8 %), plus min and max elevation and total ascent and descent. A route where a large share sits in the steep band deserves a lot of respect, and remember that steep descents on loose ground are often harder than the climbs.
Water crossings and seasonal river levels
Water crossings appear on trail pages both as a count and as waypoints you can see on the map. That count is where the research starts, not where it ends.
A crossing that is a trickle in the dry season can be a torrent after snowmelt or monsoon rain. TrailX can tell you where the crossings are, but not how deep they'll be on the day you arrive. For that, read the most recent reviews with photos, check with local rangers or park offices, and plan to walk every crossing before you drive it. If a route has several crossings late in the day, consider whether you'd rather reach them in the morning, when snow-fed rivers are often lower.
The map tells you where the water is. Only the day tells you how much of it there is. Plan for both answers.
Altitude
High routes add a layer of risk that a gradient chart doesn't show: thin air for people and engines, cold nights and fast-changing weather. Check the maximum elevation on the profile and the high points on the map, and give yourself time to acclimatise if the route climbs high.
Simikot to Limi Resort Off-Road in Humla, Nepal is rated Extreme: 71.9 km with 3,463 m of ascent. Routes like that are why we suggest browsing by region first, such as the Nepal off-road routes or Ladakh off-road routes, and comparing the profiles side by side before committing.
Remoteness: fuel, signal, mechanics and medical help
This is the bit that most often catches people out. Trail pages group waypoints into stays, fuel, mechanics, signal, medical and water crossings. Turn them on and look at the gaps between them.
Ask yourself a few questions:
- How far is it between fuel stops, and does my range cover that with a margin for low-range driving?
- Where is the last mobile signal, and who knows my plan beyond that point?
- Where is the nearest mechanic if something breaks halfway?
- How long would it take to reach medical help from the most remote point?
Long routes like the Georgetown High Passes 4x4 Loop in Colorado (271.4 km, 5,019 m of ascent) deserve this kind of planning before you commit, especially on the high, quiet sections. Our safety guidelines and gear checklist cover recovery gear, communications and what to carry when help is a long way off.
Satellite imagery, 3D terrain and street-level views
Contour lines are great, but some things only show up in imagery. Switch the trail map to the satellite layer and follow the line. Look for fresh scars where a slope has slipped, places where the track seems to vanish into a riverbed, and tight switchbacks that might be a squeeze for a long-wheelbase vehicle. The topographic Outdoors layer with contour lines helps you match those features to the terrain. Our guide to topographic map route planning goes deeper into reading contours.
Then flip on 3D terrain. Seeing a valley wall or a ridgeline in 3D makes it much easier to judge exposure and whether a track hugs a drop. Imagery can be years old, so a washout you can't see is "not visible", not "not there".
In the TrailX app, trails with good coverage also offer street-level imagery along the route and an animated 3D flyover.
Weather and condition warnings
Each trail page includes a weather forecast. In the app, you'll also see condition warnings for snow and cold, landslide risk on steep ground during heavy rain, and extreme weather. A steep, unpaved section that is fine in sunshine can become a mudslide in a downpour, so check again the evening before you set off, not just when you first plan.
Legal access and permits
Some tracks need permits, some are seasonal, and some cross private or protected land. Trail pages show permit information where we have it. Still, rules change, so confirm with the managing authority before you go, especially in national parks and border regions. Stay on the marked track, too.
Using an off road route planner for 4x4 routes
The Route Composer is great for planning the whole trip around your off-road sections: multi-stop routes, elevation profiles, weather along the route, points of interest, hillshade and 3D terrain, and A vs B comparisons side by side.
We want to be clear about one thing, though. The Composer's Off-Road profile gives you routes suited to larger vehicles. It is not dedicated 4x4-track routing, and it won't find you an unmapped trail over a pass. For the off-road parts themselves, start from something someone has actually driven:
- A published TrailX trail. Browse off-road routes in the United States or anywhere else, then check the surface, crossings and waypoints as described above.
- Your own recorded track. Record with the app, then analyse or publish it.
- A track from a friend or club. Load it into Upload & analyse to check the gradients and crossings, and use the Format Converter if it arrives in the wrong format.
Then use the Composer for the tarmac legs and the approach, and download what you need for offline use. Our post on downloading GPX files explains the options.
A quick terrain checklist
| What to check | Where to find it on TrailX | What should make you pause |
|---|---|---|
| Surface mix | Surface breakdown on the trail page | A high rock share on the steepest part |
| Steep sections | Elevation profile; gradient distribution in Upload & analyse | Short spikes, a large steep share |
| Water crossings | Crossing count and waypoints | Several crossings in the wet season |
| Altitude | Max elevation on the profile | Fast climbs to high passes |
| Remoteness | Fuel, signal, mechanic and medical waypoints | Long gaps between fuel or signal |
| Washouts and switchbacks | Satellite layer, 3D terrain, street-level imagery in the app | Track disappearing into slips or riverbeds |
| Weather | Forecast; condition warnings in the app | Heavy rain on steep, unpaved ground |
| Access | Permit information | Unclear or seasonal access |
The point of all this research
None of this is about removing the adventure. It's about deciding, calmly and in advance, which sections you'll drive, which you'll scout on foot, and where you'll turn round. If this is your first trip, our first overlanding trip checklist puts all of this into a wider plan.
Driven a route that surprised you? Leave a review with photos on the trail page. Fresh conditions from someone who was just there are the most useful terrain data of all.
Where to next?
- Find a route: browse off-road destinations in India, Nepal, the US and beyond.
- Learn the driving: our 4x4 tutorial and off-road tips.
- Stay safe out there: read the safety guidelines before any remote trip.
- Check a track: upload and analyse any GPX, KML or GeoJSON file in your browser.
- Take it offline: get the free TrailX app for navigation without signal.
Written by
TrailX
Hikers, riders and drivers mapping the world's trails, and sharing what we learn along the way.
Responses