Preview Any Trail Before You Go: 3D Flyover and Street View in TrailX
See a trail before you set foot on it. TrailX's 3D flyover flies the real route over real terrain, and street view walks it in real photos, step by step.
On this page
Most bad days on a trail start with a surprise. The climb was steeper than the map made it look, the "path" turned out to be a boulder field, or the turn-off was a gap in a hedge you walked straight past. A distance and a squiggly line can't warn you about any of that. Seeing the ground can.
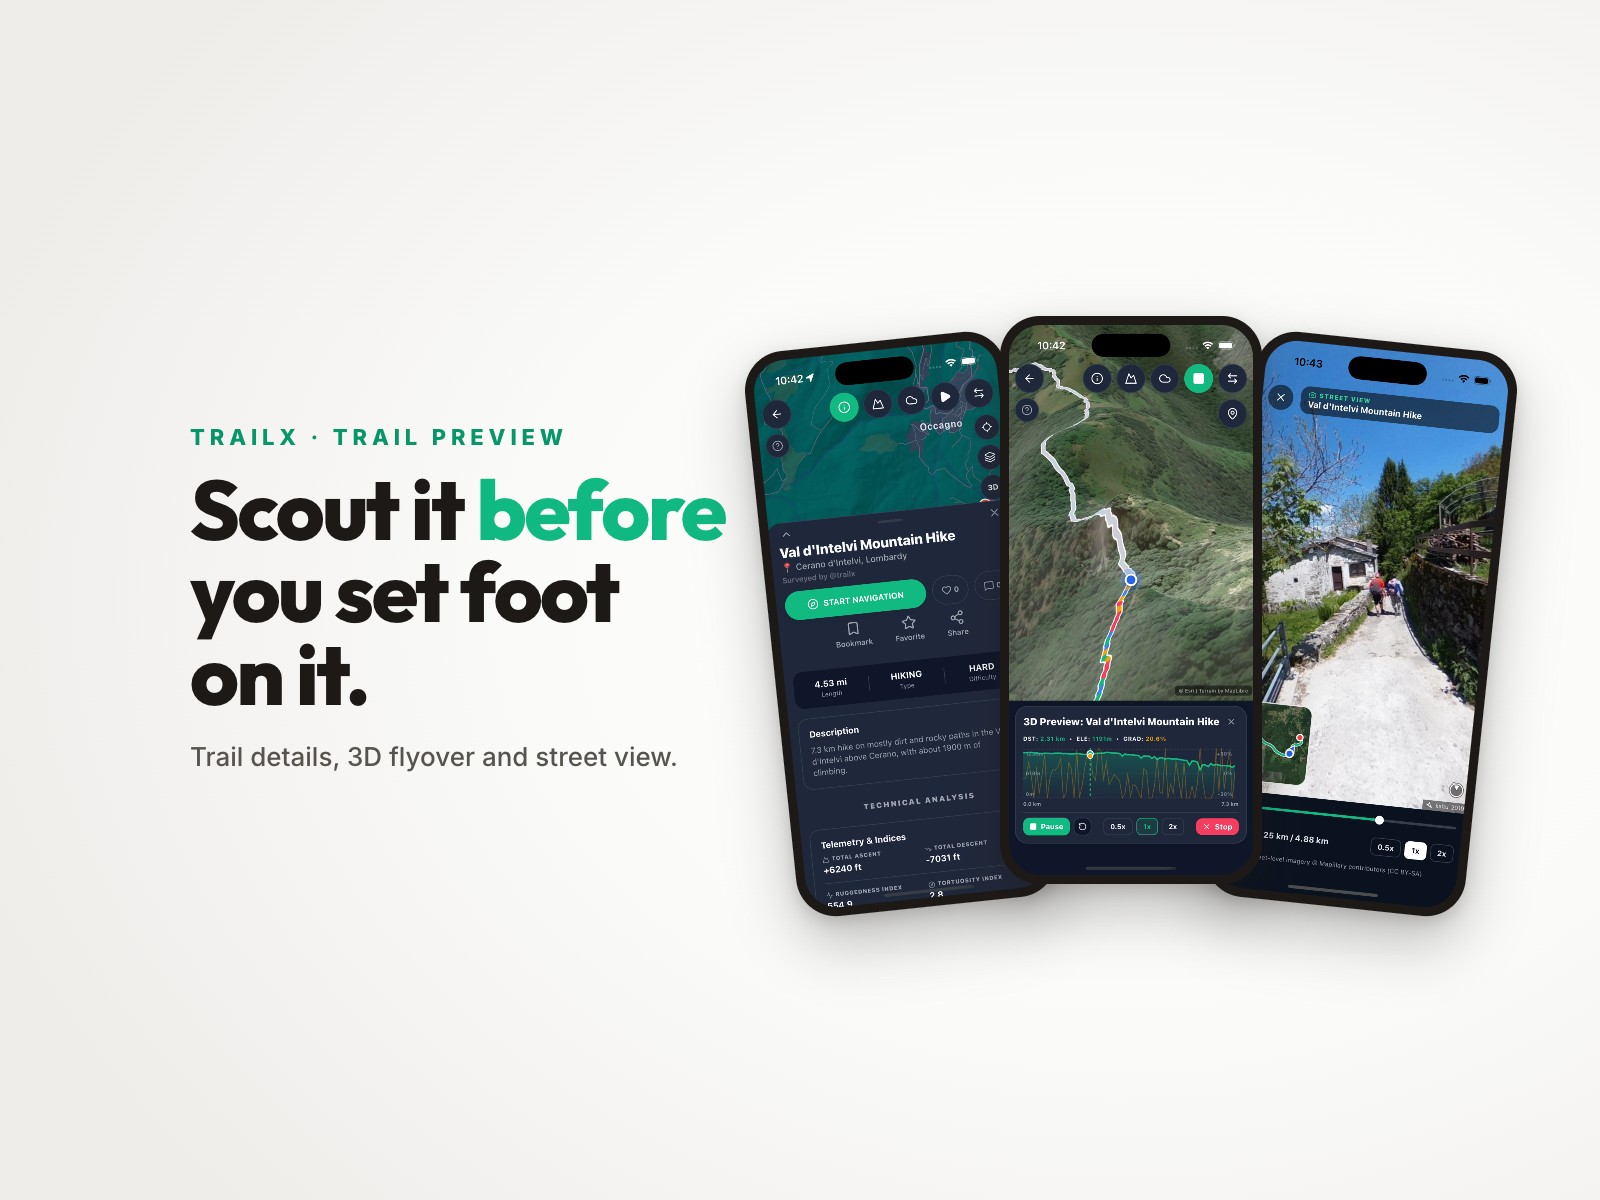
That's what two features in the TrailX app are for. 3D Flyover flies the real route over real terrain, so you see every climb and every drop before you commit to it. Street View then puts you on the path itself, stepping through real photos taken along the trail. Between them, you can scout a hike from your sofa and turn up at the trailhead already knowing what it looks like.
See it in action
Here is the whole thing on one trail, the Val d'Intelvi Mountain Hike in the hills above Lake Como: the trail details, then the 3D flyover, then street view. It's a screen recording of the app, sped up a little. For more like it, follow TrailX on YouTube.
Trail details, 3D flyover and street view on the Val d'Intelvi Mountain Hike, recorded in the TrailX app
Start with the trail details
Every trail on TrailX opens with its details: distance, total ascent and descent, difficulty, and what the ground is made of. The numbers come from the GPS track itself, not from a guidebook estimate. For the Val d'Intelvi hike that's 7.3 km with about 1,900 m of climbing, rated Hard, on mostly dirt and rocky paths.
Scroll down and you get the technical analysis: how much of the route is flat, moderate or steep, the surface breakdown, water crossings and how twisty and rugged the line is. It's the fastest way to tell whether a trail fits the day you have planned.
Numbers only go so far, though. "1,900 m of climbing" means something very different spread over a long valley than packed into a few switchbacks. That's where the flyover comes in.
3D Flyover: fly the climb before you hike it
Tap the preview button on the map and choose Drone view. TrailX loads the terrain and satellite imagery along the route, shows you the whole trail from above for a moment, then dives in behind a marker and follows it from start to finish, low and over the shoulder, turning with the trail.
A few things make it more than a pretty animation:
- The line shows how steep it gets. The route is coloured by gradient: green for flat (under 3%), blue for moderate (3–8%), amber for steep (8–13%) and red for anything steeper. A run of red going up a slope tells you exactly where the hard part is.
- The elevation profile follows along. Under the map, a live profile shows where you are, with your distance, elevation and the current gradient. You can see a ridge coming up on the chart and then watch it rise in front of you.
- You control it. Pause, restart, play it at half speed, normal or double, or drag along the profile to jump to any point. Want another look at that descent? Scrub back and fly it again.
- It's the real route on real terrain. The flyover follows the actual GPS track over the actual landscape, so the valleys, cols and drop-offs are the ones you'll walk through.
It works on any trail with a GPS track, which is every trail on TrailX, whether it's a hike, a bike ride or a 4x4 route.
The flyover tells you how hard the trail is. Street view tells you what it's like.
Street View: walk it at eye level
From the same menu, choose Street view. Now you're on the ground, stepping along the trail through real street-level photos, one every 15 metres or so, played in route order like a walk-through.
On the Val d'Intelvi hike that means forest track, a stone-walled lane through a hamlet, a patch of late snow and, a bit further on, other hikers on the path ahead. That's the kind of detail no map shows: whether the path is a wide track or a goat trail, whether there's shade, what the junctions look like.
What it does for you:
- It faces the way you're going. Where a spot has a 360° photo, the view turns to point along the trail, so the walk feels continuous.
- A mini map keeps you oriented. The corner map shows the whole route with start and finish marked, and an arrow for where you are and which way you're facing.
- You set the pace. Play, pause, change the speed, or drag the bar to jump to any point along the trail.
- Gaps are flagged. If there's a stretch with no photos, it tells you how far it's skipping rather than pretending the trail jumps.
The photos come from Mapillary, an open, community-built collection of street-level imagery. That's also why street view isn't on every trail: TrailX only offers it where photos cover most of the route. Popular trails near roads, villages and well-walked paths are the most likely to have it. Remote ones may not, yet. As more people contribute imagery, coverage grows.
How to use both before your next trip
A good routine for a trail you haven't done before:
- Read the details. Check distance, ascent and difficulty against your plan and your daylight.
- Fly it. Watch where the red sections are and how long they last. That's where you'll be slowest.
- Walk the tricky bits. Drag street view to the junctions and steep sections. If the turn-off is easy to miss, you'll recognise it on the day.
- Download it. Save the trail for offline use before you lose signal.
It takes about two minutes, and it can save you a wrong turn, a turnaround or a long walk out in the dark.
Try it on a trail you know
3D Flyover and Street View are in the free TrailX app for iPhone and Android. Open any trail, tap the preview button on the map, and choose Drone view or Street view. A good test is a trail you've already done: you'll be surprised how much you recognise.
Not sure where to start? Fly the Val d'Intelvi Mountain Hike from the video, or browse trails near you.

Written by
TrailX
Hikers, riders and drivers mapping the world's trails, and sharing what we learn along the way.
Responses